Showing posts with label Pine Tree Punch. Show all posts

Stampin Up's "TIS THE SEASON" DSP Quick Cards!


Hello and Welcome,

Today I am taking part in the Stampin Dreams blog hop, this month's theme is "Christmas".I have a quick set of cards using Stampin Up's "TIS THE SEASON" DSP, all cards have the same layout, and I have also used 1 bundle and another stamp set and punch to create these cards.


These have all been created using the same sketch, and co-ordinating colours with the Designer Series Paper. This would work with any DSP or occasion. Let's take a closer look at the cards.

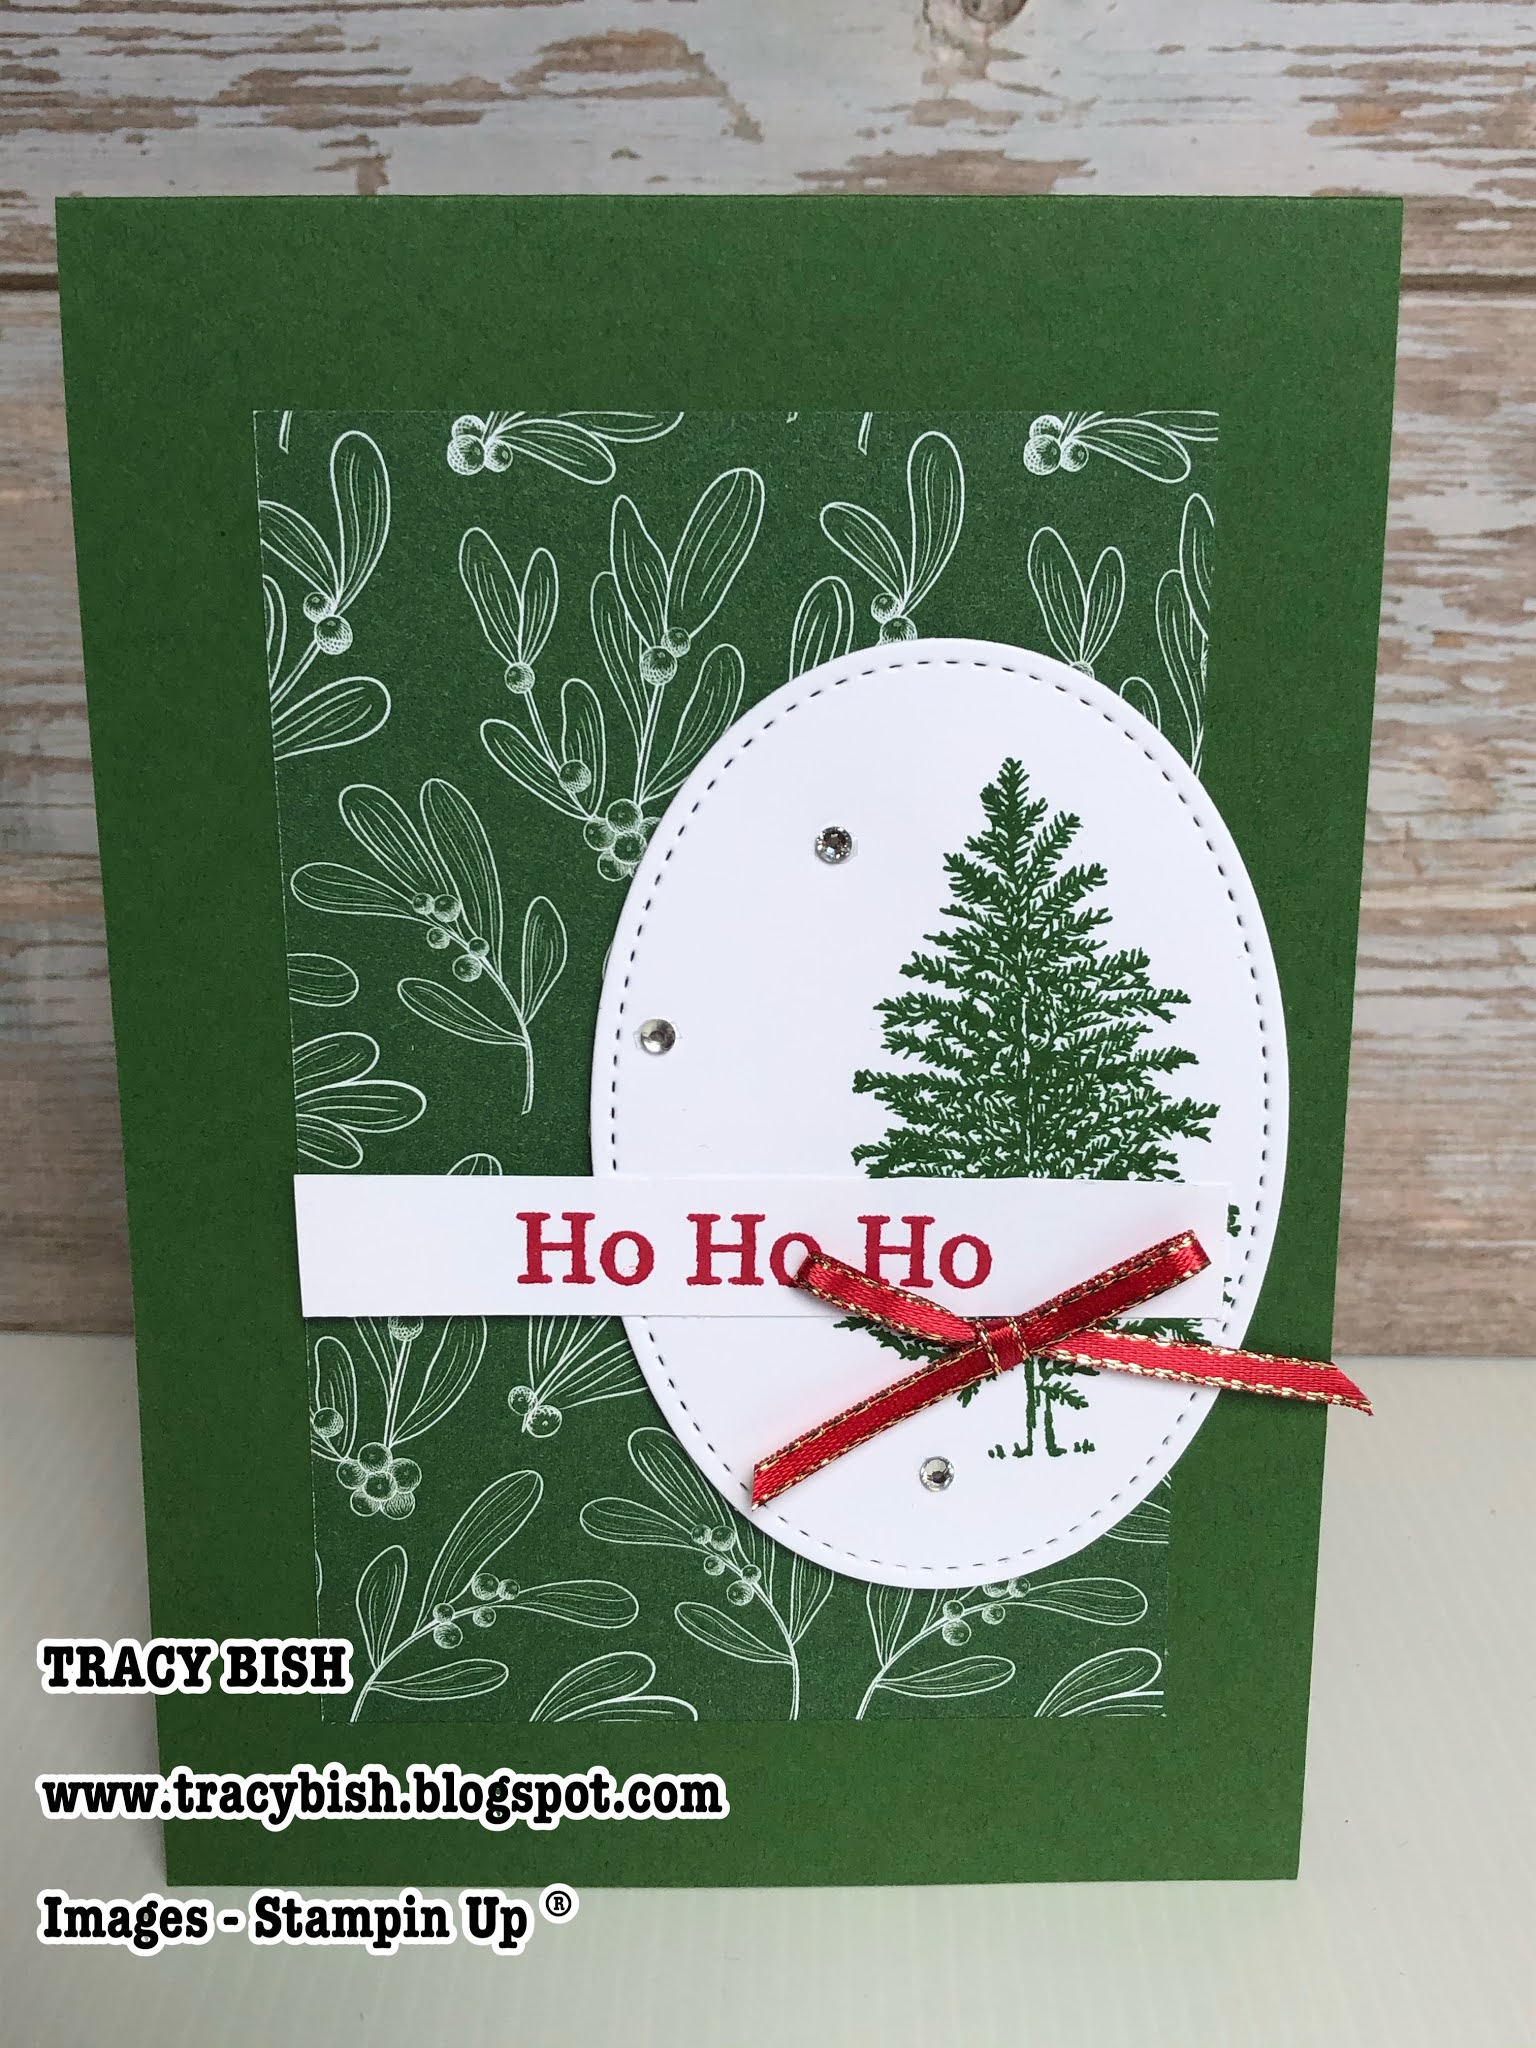


The colour combo I have used for these cards are Garden Green, Real Red, Cherry Cobbler, and Whisper White. 


VIEW VIDEO TUTORIAL HERE

I hope you have enjoyed this quick and simple cards, its a great way to use DSP, and be able to create a lot of cards without a huge amount of time spent, and lets face it, we don't always have a lot of time at Christmas!

To follow the blog hop please click on the link below. and see what wonderful Christmas projects everyone has created.

Thanks again, Take Care,

Tracy x

You are invited to the Inlinkz link party!

Click here to enter

MEASUREMENTS:
Card Base - 1/2 A4,
Tis The Season DSP 4 1/2 x 3",
Assort scrap card for decorating.


2020 Online Shoppers Code |  by Tracy Bish

When ordering, Product Suites are bundled, making ordering super easy!  With one item number, you can order the stamp/die bundle at a discounted price, plus the paper and any other coordinating products, giving you everything you need for creating perfectly coordinated projects!  I love this ordering option, and I know you will too.  Try it!!!  Just click on the above Online Shoppers Code, or any of the items in the Supply List below to go to my store.  Use this Online Shoppers Code at checkout and I will send you a special thank you for your order.  If your order is over $250, please don't use the code (you'll miss out on your own Stampin' Rewards if you use it) as you'll still receive something special in your mailbox from me.
                                                

  • Visit my online store here.
  • Shop the Clearance Rack here.
  • View the newest products available for Beginning Stampers here.
  • Join “The Inky Stampers” with me!  I love what I do and would be thrilled to have you on my team while creating, sharing and inspiring others together with you!  Do you love creating projects for others?  Do you love it all?  Would you like to save money on your stamping and/or scrapbooking supplies?  Yes?!?  Please message me for more info.You can also join my "The Inky Stampers" HERE.
  • Subscribe to my newsletter to get all the latest news and updates on what's happening and, do not worry, you can unsubscribe from it at any time - no questions asked!
  • Follow my blog  Here.


CASEing The Catty - Christmas!

Hello and Welcome,

Today's card has been CASEd from page 60 of the Stampin Up Annual Catalogue. I thought it would be great to do a few "Christmas In July" projects throughout the month.

This card uses the Perfectly Plaid stamp set and the Pine Tree Punch.


In the catalogue this is a set of 3 cards showing how to step up your cards, I love that our catalogues have so much inspiration for all levels of crafters.


With a few different layers and textures this card really is beautiful. Want to see how its created?


VIEW VIDEO TUTORIAL HERE

Thanks so much for popping by today, I hope you have enjoyed this card, if you would like to see a card CASEd from the catalogue let me know!

Until Next Time,

Tracy x 


MEASUREMENTS:

Crumb Cake card base (1/2 A4),
Vellum card 3 1/2 x 4 5/8",
Shaded Spruce card 4 1/4 x 3 1/8",
Old Olive card 4 x 2 1/2",
Real Red card 3 1/2 x 1"
Whisper White card 2 1/4 x 1 3/4".

SUPPLIES:

Let's Get Hopping # 33 "Christmas In July"


Hello and Welcome to another Blog Hop with the "Let's Get Hopping" group. Whether you have hopped here from the very talented Alicia's blog, or you are starting your journey here, I am so happy to have you visit.

The theme this month is "Christmas In July". Although we are only way half way through the year, there is no better time to start your Christmas craft then now, Christmas tends to have a way of sneeking up way too soon.


These little Christmas Trees can be used a few different ways. They make a great table decoration, place holder, or a treat holder.


These are so simple to create, I have Gold Heat Embossed 4 Trees from the "Perfectly Plaid" stamp set, and punched these out with the Pine Tree Punch.

Create a score line down both sides of your tree, this is where you will glue 3 sides together, so they will need to be scored in around the same position on each tree. 

Using the two strips that have been scored, glue these together and this will be your base for the tree. 

Snip the trunks from the trees and adhere to the base with liquid glue.

Punch a hole in the tree what will open and the middle of the three trees that are glued together.

Die Cut two stars from the Stitched Stars Die using Gold Foil. I have glued the two together at the top with a glue dot, and used liquid glue to adhere to the opening tree.

Lastly the tree is held together with the Gold Twine from the Forever Greenery Trim Combo.


The colours I have used are Shaded Spruce, Old Olive, Granny Apple Green, Pear Pizzazz, and Garden Green.

I hope you have enjoyed my project today,to continue the hop and see what Mikaela Titheridge has created, please click on the link below.


Until Next Time,

Tracy x 


MEASUREMENTS:
Card - 6 x 2 1/4" (Trees,
Card - 1 1/2 x 1" (scored @ 1/4 each end)
Card - 1 1/2 x 7/8" (scored @ 1/4" each end),
Gold Foil - 1 3/8 x 2 1/2".

SUPPLIES:

Shadow Box Card using "Merry Moose" Bundle and "Let It Snow" DSP!

Hello and Welcome,

This is such a fun card to show you today , these are called "Shadow Box Cards" and are quite easy to make, but it is such a WOW card.


The front of the card is amazing by itself, but wait till I show you the inside!!!!


And another look!


Isn't it the Sweetest!


VIEW VIDEO TUTORIAL HERE


Thanks so much for visiting today, I hope you will try this card out, if you do I would love to see your creation or even hear from you, feel free to leave me a comment here!

Have a Wonderful Day!

Tracy x 

MEASUREMENTS:

Pool Party card bases 2 Qty ( 1 full A4 - cut in half )
1 scored @ 4 1/8" - cutting off 3/4" on one side.
2nd card base scored @ 1/2, 4 1/8, & 4 3/4", cutting a sliver off on the 1/2" flap.
Pool Party card 3 7/8 x 5 5/8",
Shaded Spruce card 5 x 8",
Whisper White card - scrap for star,
Crumb Cake card 2 1/2 x 2".
DSP - Let It Snow  3 snowmans.


SUPPLIES:


The content found on this blog is the sole responsibility of Tracy Bish, an Independent Stampin’ Up! demonstrator, and the use of and content of the classes, services, or products offered on this website and all other Internet mediums associate with Tracy Bish is not endorsed by Stampin’ Up! Images © 1990 - 2022 Stampin' Up! Unless Otherwise Noted